Hello again! I'm back today folks with a cute and simple family project! I hope everyone had a safe and happy Halloween! We had a ton of trick-or-treaters at our house that night and it was so fun to hand out candy and see all the creative costumes. And now that Halloween is over, it is on to the next holiday season...THANKSGIVING! I absolutely love Thanksgiving, more specifically for the turkey dinner at my parents' house, but also for the time to reflect on giving thanks for all that we have. I was inspired by many people on Facebook who have recently begun posting reasons why they are thankful each day for the month of November. While I love social media and appreciate people sharing their reasons on Facebook, I thought it would be fun to do a family project and create a thankful tree together with my husband.
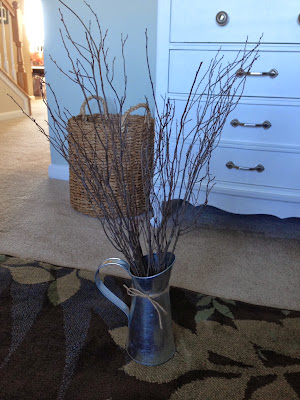
So on my weekend trip to Hobby Lobby, I picked up some skinny tree branches that were 50% off ($3.99) to help create our tree. I used a simple, silver can that I had for a "vase" for my branches.
To start, I removed the plastic wrap from my branches and started to arrange them in the can. I probably should have bought two packages of branches to make it a bit more fuller but I still think it turned out fine.
Once my branches were arranged how I wanted them, I gathered up some scrapbook scraps that I had lying around that I thought were "Thanksgiving-ish" colors. My plan was to use my circle punch to punch out some circles to use as the "leaves" for our tree.
I punched out three or four circles of each patterned paper because the idea is to add a "leaf" each day of November with something that you are thankful for written on each one. My husband and I are each planning to do one each day. When I was done I had about 50 or so circles ready for all that wonderful thankfulness!
After I had punched out all my circles, I went back and put a small hole punch at the top of each one so that they could easily be hung on my tree branches. I was able to punch like four or five at a time so it went pretty fast. Once the holes were punched, we wrote some reasons why were thankful and simply slipped the branch through the small hole and let it hang. Voila!
I thought our thankful tree would make a great dining room table centerpiece so that is where I headed with my finished tree, complete with a few thankful leaves for the first few days of November. My husband was very sweet and said he was thankful for his "wonderful wife" on the first day! What a guy! We plan to continue adding "leaves" each day to our tree and are enjoying being able to reflect about all that we are grateful for this holiday season.
Oh..I also put the extra "leaves" and some markers to write with in a cute little leaf dish I had lying around from my fall decor. That way it is easy to grab a circle, write on it, and hang it on the tree each day.
I hope you enjoyed our fun family project! I would love to continue this as a tradition when we have little ones running around one day. And while we don't spend Thanksgiving at our house, we might have to take our little thankful tree to my parents' house so they can add to it on the days we are there as well! Hear that mom...make room for my tree somewhere!! :)
Anyone else trying to reflect this November? Trying the 30 days of Thankfulness? Anyone else making a tree?


No comments:
Post a Comment